Home / BE POWER EQUIPMENT


UNLEASH THE POWER!
Proud to be one of the largest pressure washer, generator and water pump manufacturers in North America. BE Purpose: Help Clean the World. BE Mission: Deliver high-quality power equipment fast and on time to global customers through a dedicated and engaged team. BE Vision: Always challenge ourselves, ensure management and employees think outside the box, and strive toward continual improvement.
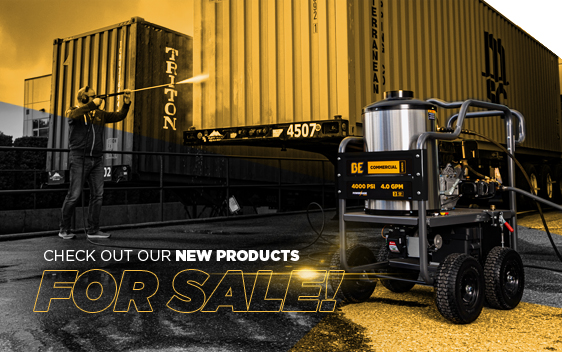
Check out the newest BE Power products for sale below.
BE POWER EQUIPMENT CATEGORIES
PRESSURE WASHERS
INVERTERS / GENERATORS
WATER PUMPS
AIR COMPRESSORS
ACCESSORIES
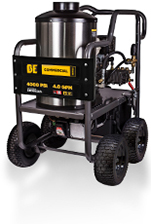
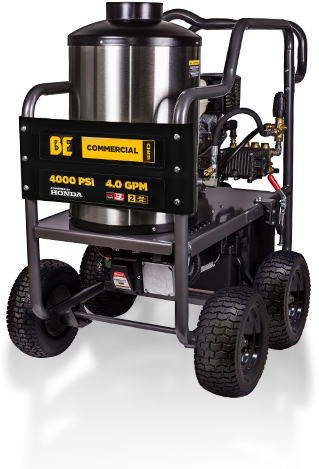
HW4013HG – Hot Water Pressure Washer
4,000 PSI – 4.0 GPM Hot Water Pressure Washer with Honda GX390 Engine and General Triplex Pump
- Professional quality Honda GX390 engine
- Direct drive system
- Commercial grade General triplex pump
- External unloader
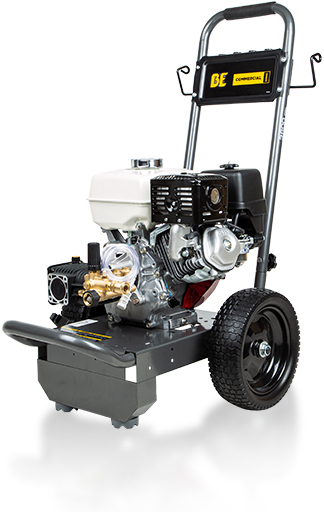
BEP B389HA – Hot Water Pressure Washer
- Commercial Honda engine
- Direct drive system
- Commercial grade AR triplex pump release valve
- Built-in unloader
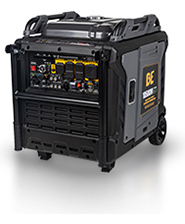
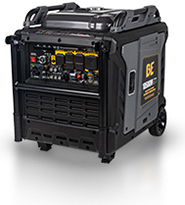
BE10500IT – 10,500 Watt Digital Inverter Generator
- POWEREASE 458CC ENGINE
- 10,500 GMW
- 8,500 RW
- TRI-FUEL Inverter
- Produces clean energy
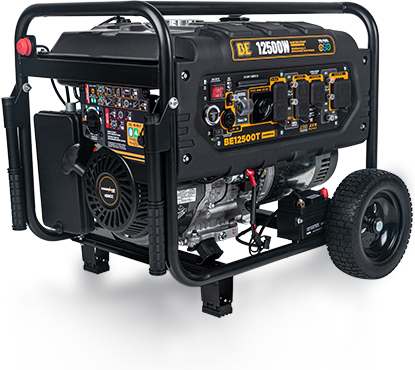
BE12500T – 12,500 Watt Generator
- POWEREASE 458CC ENGINE
- 12,500 GMW
- 9,000 RW
- Electric start
- Rugged and reliable engine
- Durable powder coated steel roll cage
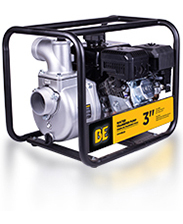
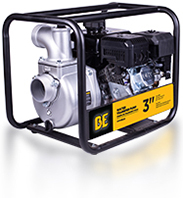
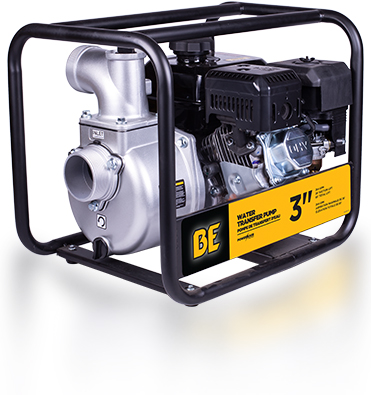
WP3070S – 3″ Water Transfer Pump with POWEREASE 225 Engine
- 158 GPM | 35 PSI | 212CC
- POWEREASE 225
- 85’ TOTAL LIFT
- Aluminum light weight body
- Steel roll cage
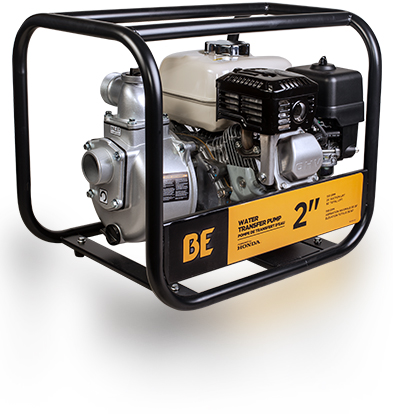
WP2065HL – 2″ Water Transfer Pump with Honda GX200 Engine
- 158 GPM | 33 PSI | 96CC
- 196CC Honda
- 82’ TOTAL LIFT
- Aluminum light weight body
- Steel roll cage
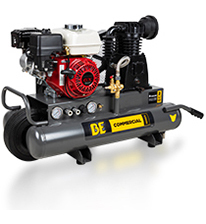
AC658HB – 13.8 CFM @ 90 PSI Gas Air Compressor with Honda GX200 Engine
- 13.8 CFM @ 90 PSI
- HONDA GX200
- 196CC
- Belt drive system
- Heavy-duty, splash lubricated pump
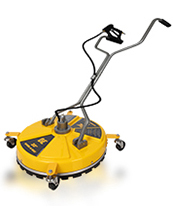
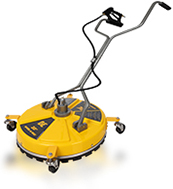
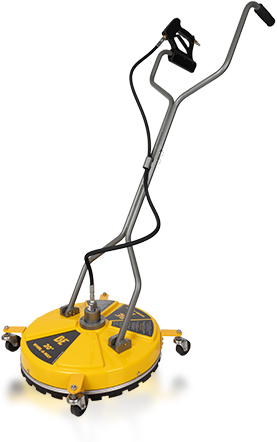
20″ Whirl-A-Way Surface Cleaner
- Ergonomic tWIN handles
- Quick connect
- ABS Polymer housing
- Four swivel casters
- Bristle skirt
Turbo Rotary Nozzle – RJ-3030-CS
- 3,600 PSI
- 80°C / 175°F Max temperature
- 1/4″ Quick connect inlet
Learn More About BE Power Equipment Products
Here, you’ll find various product videos, how-to demos and troubleshooting guides. The BE Power Equipment YouTube channel will be consistently adding new videos, so subscribe to ensure that you don’t miss out on anything new!
BE POWER EQUIPMENT
HOT WATER PRESSURE WASHERS
DEVELOPED IN HOUSE: ENGINEERED IN HOUSE FROM THE GROUND UP
MADE IN CANADA
HW2765HG – Hot Water Pressure Washer
2700 PSI 2.8 GPM
Honda GX 200 Engine
12 Volt AGM Deep Cycle Battery
12 Volt Diesel Fired Wayne Burner
Direct Drive Triplex Pump
HW4013HG – Hot Water Pressure Washer
4000 PSI 4.0 GPM
Honda GX 390 Engine
12 Volt AGM Deep Cycle Battery
12 Volt Diesel Fired Beckett Burner
Direct Drive Triplex Pump
Electric Start Honda Engine
HW4013HBG – Hot Water Pressure Washer
4000 PSI 4.0 GPM
Honda GX 390 Engine
12 Volt AGM Deep Cycle Battery
12 Volt Diesel Fired Beckett Burner
Belt Driven Triplex Pump
Electric Start Honda Engine
HW4015RA – Hot Washer Pressure Washer
4000 PSI 4.0 GPM
POWEREASE R420 Engine
12 Volt AGM Deep Cycle Battery
12 Volt Diesel Fired Beckett Burner
Direct Drive Triplex Pump
Electric Start POWEREASE Engine
READY FOR ANY SCENARIO
Included Accessories:
Soap Injector
0°, 15°, 25°, 40° and Soaper Nozzles Included
Rotary Turbo Spray Nozzle
*Included only with HW4013HBG
36-Inch Insulated Gun Wand
*47-Inch Heavy-Duty Wand Included with HW4013HBG
50-Foot Steel Double Wire High Pressure Hose
*100-Foot Hose Included with HW4013HBG
HOT WATER PRESSURE WASHERS
BE The Power You Need.
BE POWER EQUIPMENT WATER PUMPS
WATER TRANSFER PUMPS – Up To 158 Gallons Per Minute
HIGH PRESSURE PUMPS – Cast Iron & Aluminum Pump Housing
The Power You Need.
CHEMICAL TRANSFER PUMPS – Ideal For Liquid Fertilizers
SEMI TRASH PUMPS – Solid Capacity 5/8 Inches
FULL TRASH PUMPS – Up To 1-Inch Solid Capacity
PORTABLE HIGH PRESSURE PUMP – Equipped With 12-Inch Suction Hose & 50-Inch Lay Flat Hose
BE POWER EQUIPMENT WATER PUMPS
BE The Power You Need.
Hey, this is Nate with BE Power Equipment. Today’s Tech Talk we’re going to be going over startup procedure on our portable hot water series. The information I go over today will apply to all of our units, but for today’s purposes, I’m going to be using the Honda series.
TECH TALK: PRESSURE WASHER START UP GUIDE
The first thing you want to do is engage your wheel lock. The next thing you want to do is check your oil levels. Start with your engine oil level by removing the dipstick, wiping it clean, reinserting it back in the engine, and pulling it out to check your oil level.
To check the pump oil level, you’ll either see it in the sight glass or halfway between the marks on the dipstick. Once your oil levels are good, you’re going to want to fill the engine with gasoline. Recommended is 87 octane or higher, and a maximum of 10 percent ethanol content.
After you fill the unit with gasoline, you’re going to need to fill it with diesel. It is very important to fill diesel in the diesel tank only, and gasoline in the gasoline tank only. Never mix the two fuels.
Now you’re ready to connect your hoses to your machine. You’ll start with your garden hose. Check your inlet screen for any debris and that the rubber is good. Connect your garden hose, then you’ll take your high-pressure hose and connect it to the outlet of the machine. Then you take the other end of your high-pressure hose, and connect it to the bottom of the gun. You’re ready to turn on your water supply.
With your water supply on, you’re going to squeeze the trigger of the gun to release any air through the line, and flush it with no nozzle installed, before starting the engine.
You’ll have to prepare the engine to start it. If it’s cold, you’ll need to move the choke lever all the way to the left. The fuel valve will go all the way to the right. Your throttle lever will go halfway in the middle. Now you’re ready to start your engine.
Now we’re going to start the engine. Take your gun and squeeze the trigger. Make sure water is flowing. You always want to make sure water is flowing through the pump before you start your engine. Then you’re going to see me turn the engine on with the electric start switch. Move my choke lever to its off position, and pull the throttle to the maximum position.
HOT WATER BURNER: START UP GUIDE
Once the engine is running and the water is flowing, then I’ll be putting the nozzle into the end of the gun. Squeeze the trigger to make sure that the cold-water pressure washer is working. Adjust the thermostat to a maximum position. Turn the burner switch to ON. The red light will come on indicating that the burner is on. And you’ll wait about two or three minutes before the hot water will be ready.
This has been our Tech Talk on our startup procedure for our portable hot water pressure washers. Don’t forget to like and subscribe to our YouTube channel, and keep watching for future videos.
BE The Power You Need.
The Herd Has Arrived
The Future Of Generators Has Arrived
The Herd Is Here
Generators For Every Need
GENERATORS.BEPOWEREQUIPMENT.COM
Hi there. Brandon from BE Power Equipment, and on today’s video I’m going to show you how to use your soap injector on your BE Power Washer.
One of the first things you need to do, anytime you’re going to use your BE pressure washer, is you want to make sure that you do your pre-use fluid inspection. I’m going to link some videos in the description on how to do that and the full startup procedures on your GC, GX and POWEREASE engines below.
One of the things you’re going to notice is your soap injector is either going to be a built-in or an external one. This particular soap injector is an external.
The first thing you want to look at is you always want to make sure that your screen is clean at the end of your line. Once you’ve done that, you’re ready to place your hose in your bucket or container of solution. You want to do two parts water and one part solution. This is more than adequate for any application needed. You want to be sure to pick up your BE Power carwash solution from the closest dealer available to you.
Once you have the hose placed in the solution, we’re ready to take a look at the soap nozzle that you need for the job. Every BE power washer comes with a black soaper tip that you want to make sure that you put into the end of your wand here. This is the particular tip here that you need to use, or your soap injector will not work.
Now, we’re ready to start the unit. Okay, so once you’ve started the unit, you’ve got your black tip at the end of the wand, you’re ready to spray the surface that you want to clean. So obviously, you want to start from the top down.
Now we’re ready to rinse the vehicle. Now what you’ll notice is that there’s going to be a little bit of soap that is going to come out. That’s the soap that remains in the line. After a short while though you will have just water that comes out of the wand, and that will be more than sufficient to rinse the vehicle.
Now that you’re done with your cleaning project, the next step is very important. What you want to do is you want to make sure that you clean out your soap injector line and your external soap injector. The reason for this is because in here is a little spring in a little ball, and if soap sits and gums up on that, it could affect future use.
So, what you want to do is you want to place the line in a clean bucket of water, and you want to turn the unit on. Once the unit’s on, you want to spray water out the gun until you see a sufficient amount of water run through your line. That should take care of that.
I hope you liked the video. If you found the video helpful, please leave a like, and be sure to subscribe. If you have any questions, comments or concerns, please visit our webpage, call our hotline, or leave a comment below, and we’ll be sure to get back to you. My name is Brandon. See you next time.
Sandblasting Kit: Set Up Guide
1. Connect Pickup Tube & Pickup Pipe
Secure using a screwdriver or socket wrench (9/32 or 7MM)
2. Place Pointed End Into Your Sand
3. Connect Sandblaster Head To Your Gun Wand
4. Adjust Media To Water Ration Using Valve On The Side
5. Purge Line Of Air By Holding Down The Trigger For At Least 10 Seconds
6. Start Your Machine & Start Sandblasting
7. Test Sandblaster
Use scrap before proceeding with your project
BE The Power You Need
© Copyright 2024. National Automotive Parts Association. All Rights Reserved
